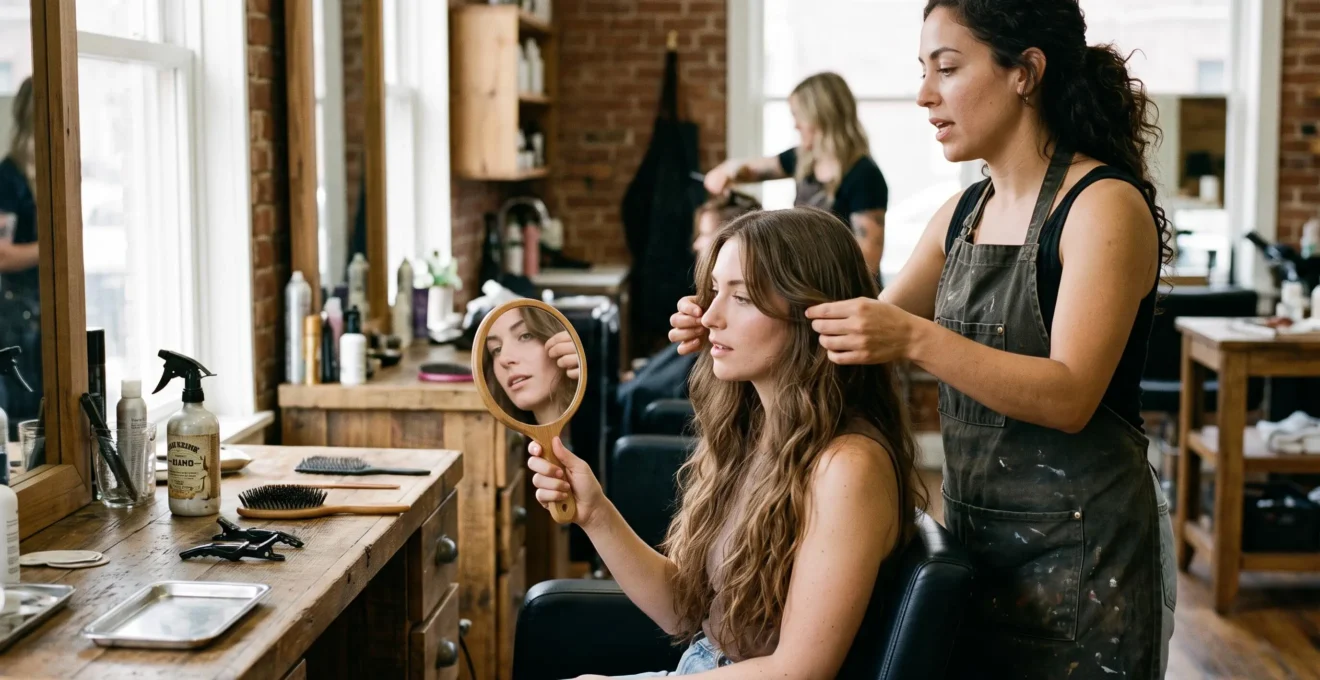
The safest hair trend is not necessarily the smallest change. It is the one that works with your natural texture, fits your daily routine and still looks intentional as it grows out. A soft face-framing layer, a non-lightening tonal gloss or even a temporary styling change can deliver a noticeable refresh without forcing you into months of corrective appointments.
The trouble is that hair inspiration rarely shows the full maintenance story. A perfectly styled butterfly cut may rely on a professional blowout. A fashionable fringe can demand attention every morning. Even natural-looking balayage may involve chemical lightening that cannot simply be washed away.
Before choosing a trend, consider three separate risks: how it looks without salon styling, what happens as it grows and whether maintaining it could compromise your hair health. The best decision is often a carefully adapted version of the look you love, rather than an exact reproduction of the reference photograph.
Low-commitment hair trends: the essentials
- Long face-framing layers and non-lightening tonal changes generally offer more flexible grow-out than blunt fringes or dramatic cuts.
- Judge a trend by your natural texture and realistic styling time, not by a professionally finished photograph.
- If cutting or colouring feels too permanent, experiment with temporary styling, clip-in pieces or graphic eyeliner instead.
- Why Do Trend Haircuts Look Amazing Online but Wrong on You After 2 Weeks?
- How to Test a Hair Trend With 3 Questions Before You Sit in the Chair
- Which Is the Lowest Commitment Change: Fringe, Layers, or a Subtle Colour Shift?
- The Hair Trend Mistake That Forces Daily Heat Styling and Breaks Your Ends in 8 Weeks
- When Should You Try a New Hair Trend to Avoid Awkward Grow-Out During Busy Months?
- How to Ask for Balayage Using 4 Specific Phrases So You Don’t Get Stripes or Too Much Blonde
- How to Map Graphic Eyeliner With 2 Anchor Points So Both Eyes Match Without Redrawing
- How Can You Wear Graphic Eyeliner That Looks Sharp for 6 Hours Without Smudging or Transfer?
Why Do Trend Haircuts Look Amazing Online but Wrong on You After 2 Weeks?
Trend haircuts often look different after two weeks because the salon finish has disappeared, not necessarily because the haircut was unsuccessful. Professional blow-drying, precise sectioning and styling products create movement that your natural hair may not reproduce. Once you return to your normal wash-and-dry routine, the gap between the photographed style and its everyday behaviour becomes obvious.
Consider a butterfly cut with dramatic, outward-sweeping layers. The reference image may show volume and carefully curved ends. On naturally straight, fine hair, those layers might fall flat without a round brush. On wavy hair, they may form a softer, less uniform shape. On tightly coiled hair, shrinkage can change the apparent length and distribution of the layers.
Natural hair behaviour matters more than the trend name. Before copying a haircut, assess the following characteristics:
- Texture: Straight, wavy, curly and coily hair respond differently to layering and shaping.
- Density: Removing too much bulk can make low-density hair appear thinner, while insufficient shaping may leave dense hair with unwanted volume.
- Growth pattern: Cowlicks, directional growth and a strong parting can affect how a fringe or short section sits.
- Natural movement: A haircut that depends on deliberately sculpted bends may behave differently between washes.
Face-shape rules are also less reliable than social media makes them appear. Two people with similarly shaped faces may need different curtain fringes because their foreheads, hairlines, densities and growth patterns differ. A French bob that frames one person’s jaw beautifully may sit awkwardly on another because of curl shrinkage or an unexpected flick at the neckline.
For hair-health decisions, the American Academy of Dermatology‘s healthy hair-care recommendations emphasise adapting care to hair type and limiting excessive heat. Those principles are useful when assessing the practical demands of a fashionable cut, although they do not establish which individual trend will suit you.
The less visible problem is maintenance. A cut that looks good only after repeated high-heat styling could create more trouble than an imperfect silhouette, particularly if your ends are already fragile.
Instead of asking whether a haircut looks attractive in a photograph, ask whether you still like its shape when the model’s hair is left to behave naturally. That distinction leads to a much more useful pre-salon test.
How to Test a Hair Trend With 3 Questions Before You Sit in the Chair
Before committing to a hair trend, ask three questions: Can I reproduce it on an ordinary morning? How will it look after four, eight and twelve weeks of growth? Can it be reversed, concealed or blended into my existing hairstyle? If any answer is uncomfortable, choose a softer version of the trend before allowing your stylist to cut or colour.
These questions turn vague concerns about regret into decisions you can make during a consultation.
| Question | What to check | Warning sign |
|---|---|---|
| Can I maintain it? | Tools, products and minutes available on a normal weekday | The look requires daily styling you rarely have time for |
| How will it grow out? | Likely shape at weeks 4, 8 and 12 | Short sections may obstruct your eyes or become difficult to blend |
| Can I reverse it? | Ability to pin back, recolour, trim or blend the change | Correction would require sacrificing length or adding chemical processing |
These checkpoints are planning milestones, not promises that every person’s hair grows at the same rate. Ask your stylist to explain how your proposed cut is likely to evolve.
Virtual hairstyle apps and AI filters can help you evaluate the overall silhouette, approximate length or placement of a fringe. However, they cannot reliably recreate the way your actual strands respond to humidity, shrinkage, cowlicks or styling.
Combine the digital preview with a physical experiment. Pin your front hair forward to imitate fringe placement, tuck longer sections underneath to approximate a bob or use a temporary parting to see whether face-framing pieces would change your silhouette.
For references, search the trend name alongside your natural texture: for example, “curtain bangs fine hair” or “butterfly cut naturally curly hair”. Look for examples without elaborate styling, ideally including side views and air-dried results.
Your five-step pre-salon trend check
- Photograph your clean, naturally dried hair from the front and side. Save two baseline images.
- Find three inspiration photographs featuring hair with a texture and density similar to yours. Save the references together.
- Simulate the proposed fringe, length or parting with pins or a virtual preview. Take one comparison photograph.
- Write down your actual weekday styling allowance and available tools. Keep a short maintenance note.
- Ask your stylist to describe the likely result at weeks 4, 8 and 12, plus the easiest adjustment if you dislike it. Record the agreed backup plan.
Once you know your styling capacity and tolerance for grow-out, comparing fringes, layers and subtle colour changes becomes much easier. They carry very different kinds of commitment.
Which Is the Lowest Commitment Change: Fringe, Layers, or a Subtle Colour Shift?
Long, softly blended layers and non-lightening colour changes are generally easier to live with than a full fringe. Layers often grow into the surrounding haircut, while a temporary or subtly fading tonal change may require little visible correction. A fringe creates an immediate transformation but can demand frequent trims and styling. The safest option depends on whether your main concern is grow-out, maintenance or chemical damage.
Every change involves a different commitment. Cutting alters the physical length of your hair, while colouring alters its appearance and potentially its condition. A treatment that looks temporary may still use ingredients that affect the hair beyond the visible life of its colour.
| Change | Grow-out behaviour | Reversibility | Typical maintenance concern |
|---|---|---|---|
| Full fringe | Short pieces gradually enter the eyes and need blending | Can be pinned back, but length cannot be restored immediately | Frequent trimming and possible daily reshaping |
| Long face-framing layers | Usually blend into longer hair more easily | Can often be tucked away or pinned | Some shaping may be needed to reproduce the salon finish |
| Non-lightening tonal gloss | Effect may gradually fade, depending on formula and hair porosity | Varies by formulation and starting colour | Possible tonal refreshes and uneven fading |
| Balayage | Can create softer visible root regrowth | Lightened hair remains chemically altered | Toning, colour care and potential lightening damage |
Choose the half-committed version when you want the trend without its most inconvenient consequences.
- Instead of heavy blunt bangs, consider a longer, wispy bottleneck fringe that can be swept to the sides.
- Instead of a heavily layered shag, try a few long face-framing pieces that preserve the weight of your ends.
- Instead of a dramatic colour transformation, discuss a tonal gloss or low-contrast colour adjustment.
Hair condition changes the recommendation. If your hair is already brittle or chemically overprocessed, avoid assuming that a subtle-looking colour service is harmless. Some glosses involve oxidative colour, and lowlights or root smudges may still require chemical processing. A colourist should assess the actual formula and your hair history.
For fragile hair, avoiding additional lightening is often more important than selecting a fashionable colour technique. Trimming damaged ends can remove compromised hair, but it cannot repair damage higher along the shaft.
If grow-out is your primary concern, choose long layers or a colour change with minimal root contrast. If morning styling is the problem, be cautious with fringes that fight your natural growth pattern. If chemical damage is the concern, consider a modest trim or a genuinely non-chemical styling change first.
One more factor deserves equal weight: the amount of heat required to maintain the result. An apparently low-risk haircut can become a poor choice if its shape depends on constant straightening or curling.
The Hair Trend Mistake That Forces Daily Heat Styling and Breaks Your Ends in 8 Weeks
The mistake is choosing a haircut that only works when it is heat-styled into a particular shape. Trends such as glass hair, polished blowouts and sculpted waves can create a daily maintenance obligation. Repeated heat exposure can gradually weaken hair and contribute to breakage, although eight weeks is an illustrative period, not a scientifically established deadline for damaged ends.
A straight, glossy finish may look effortless in a photograph. In practice, reproducing it on naturally wavy or curly hair can involve blow-drying, sectioning and straightening. Similarly, a layered haircut marketed for its airy movement may require repeated round-brush styling to hold that shape.
Before agreeing to a cut, ask the stylist to demonstrate its maintenance routine rather than merely describing the finished appearance.
Request the actual sequence: washing, drying, sectioning, product application and heated-tool use. Then compare the routine with the time you genuinely have on a weekday.
Hypothetical example: the hidden styling workload
Imagine someone who chooses a sleek layered cut and discovers that reproducing the reference photograph requires 20 minutes of heat styling every workday. Across five weekdays, that becomes 100 minutes of additional weekly styling time.
This calculation illustrates maintenance burden, not a predicted level of damage. Actual hair outcomes depend on temperature, frequency, technique, existing condition and other exposures.
Heat risk is cumulative rather than governed by a reliable countdown. Previously bleached or fragile hair may be especially vulnerable to additional stress. Hair that breaks at the ends can also appear to make little progress in length, even while growing at the roots.
The American Academy of Dermatology’s advice on damaging hair-care habits recommends allowing hair to air-dry when possible, using lower temperatures and reducing the frequency of heated styling tools. Its guidance does not establish that visible breakage will occur within any particular eight-week period.
The protective alternative is a cut that works with your natural finish. For wavy hair, that might mean shaping which supports existing movement. For curls or coils, it may mean assessing how the sections fall after shrinkage. For straight hair, preserving enough weight can sometimes reduce unwanted movement at the ends.
Ask your stylist to evaluate your hair in its natural state and, where practical, show you how the cut behaves after air-drying before the appointment ends. This will not predict every future styling result, but it exposes unrealistic maintenance expectations.
A manageable haircut should fit your normal life rather than require a new daily routine. Once the maintenance burden is clear, the next question is whether the timing of your transformation makes sense.
When Should You Try a New Hair Trend to Avoid Awkward Grow-Out During Busy Months?
Try a noticeable haircut when you have enough flexibility for an adjustment before your next important event, rather than immediately before a wedding, holiday, interview or demanding work period. Start with the event date and work backwards, considering the haircut’s likely grow-out pattern and trim requirements. When timing is uncertain, favour a reversible or easily blended change.
The calendar risk depends on the type of trend. A new fringe may look polished initially but require reshaping once the front sections approach your eyes. A sharp bob can lose its intended outline as it grows. Longer layers often have a less obvious transition, while some colour changes fade without producing a sharp root boundary.
There is also an important distinction between a style looking good immediately after cutting and remaining suitable for your next event. A short fringe or sharply defined shape may be at its most intentional during the early weeks, particularly when the salon has just finished it. That does not guarantee it will suit a later high-visibility occasion.
A useful planning method is to work backwards from the date that matters:
- Identify the period when you want your hair to look predictable, such as a major work presentation or a holiday.
- Ask your stylist when the proposed fringe, bob or layers will probably need reshaping, based on your hair and the planned length.
- Consider whether you can realistically attend a follow-up trim or toner appointment during that period.
- If the possible awkward phase overlaps with a busy month, postpone the more permanent change or choose a softer alternative.
For instance, suppose you have an important event in several weeks and are considering a blunt fringe. Rather than assume it will remain perfectly positioned, ask how its length is expected to change and whether a small trim shortly beforehand would be advisable. This is a hypothetical planning example, not a universal haircut schedule.
Colour requires separate consideration. A tonal gloss may fade gradually, whereas highlighted hair can show increasing contrast as it grows. Well-placed balayage can soften that contrast, although the lighter sections remain until cut off or recoloured.
When you cannot find a suitable appointment window, design the grow-out problem out of the change. Clip-in fringes, long face-framing pieces, temporary styling or appropriately selected demi-permanent colour may offer more flexibility. Demi-permanent colour is not automatically reversible or damage-free, so confirm its behaviour before application.
If your calendar rules out a dramatic cut but you still want a visibly different look, softly blended colour may be worth discussing. Getting the right result, however, starts with precise language during the consultation.
How to Ask for Balayage Using 4 Specific Phrases So You Don’t Get Stripes or Too Much Blonde
To request natural-looking balayage, describe the root blend, face-framing brightness, maximum lift and highlight placement separately. Ask for soft transitions rather than obvious bands, and specify how much of your natural base you want to keep. These instructions give your colourist a clearer target than asking for “subtle balayage” alone, although the result still depends on technique and hair history.
Balayage involves selectively applying colour or lightener to produce blended highlights. It is often chosen for softer visible regrowth because the lightened sections can begin away from the root rather than creating a uniform line close to the scalp.
Use these four phrases during your consultation:
- “soft, blended regrowth line, not a hard foily edge” — This communicates that you want a gradual root transition rather than an obvious boundary between light and dark hair.
- “face-framing pieces brighter than the rest, but keep my base depth” — This asks for brightness around the face without transforming the overall depth of your natural colour.
- “no more than [X] levels lighter than my natural colour” — Agree on the appropriate value for X with your colourist after assessing your starting level, hair history and desired tone. This prevents an undefined request for “a little lighter” from turning into a much more noticeable change.
- “weave the highlights fine so there’s no blocky sectioning” — This signals a preference for delicate, distributed lightness rather than broad, contrasting ribbons.
Visible stripes can result from heavy sections, pronounced colour contrast, placement or insufficient blending. Foils themselves are not inherently responsible: skilled colourists can use foils to achieve soft effects, and freehand painting can still produce an undesirable result if the placement is poorly planned.
The Wella Professionals‘ explanation of balayage techniques and maintenance describes hand-painted colour placement, softer root transitions and the possible need for toner refreshes. The manufacturer also notes that balayage almost always involves pre-lightening.
That distinction matters: low-maintenance colour does not mean damage-free colour. A softly blended highlight may require fewer root touch-ups, but lightened lengths remain chemically altered. Fragile or previously bleached hair needs particular caution.
Before the service, agree on both the lightness and the finished tone: warm, neutral or cool. Ask whether a gloss or toner will be used, what it is intended to achieve and how its appearance may change between appointments. Toner can help refine unwanted warmth, but not every balayage requires the same toning process, and brassiness has multiple possible causes.
After colouring, ask to inspect the placement while the hair is wet, understanding that wet colour can appear darker and less dimensional. Then assess the dry result under natural light where possible. This helps you check both the tonal balance and the visibility of any harsh sections before leaving.
Balayage can reduce the appearance of a hard grow-out line, but it does not eliminate chemical commitment. If even that feels excessive, a trend you can remove in minutes may be a better place to experiment.
How to Map Graphic Eyeliner With 2 Anchor Points So Both Eyes Match Without Redrawing
Graphic eyeliner is a useful zero-grow-out alternative to changing your hair. To create a balanced design, establish two visual anchors for each eye: an inner reference near the tear duct and an outer reference aimed towards the end of the brow. Connect the planned shape with small marks before filling it, then compare both eyes while facing forward.
This approach makes a dramatic look easier to test without committing to scissors, lightener or months of maintenance. Eye makeup still needs appropriate products, careful application and removal, but it does not change the length or chemical structure of your hair.
Begin by looking directly into a mirror in good lighting. Identify the inner corner of each eye and the direction you want the outer line to travel. The brow endpoint provides a useful directional guide, not a rigid rule that suits every eye.
Then follow the same sequence on each side:
- Mark a small starting point close to the inner corner, keeping product out of the eye and tear duct.
- Place the intended outer endpoint, using the brow tail as a reference for the line’s direction.
- Sketch short, light dashes between the planned points, following a shape visible with your eyes open.
- Repeat on the other side before fully darkening either design.
- Compare both eyes from the front, then refine the lines and fill the graphic sections.
Working in small stages limits the amount of liner you may need to remove when correcting the shape. It also prevents one fully finished eye from dictating an unnecessarily difficult design for the other.
Take a straight-on photograph with your face level and both eyes relaxed. A photograph can help reveal differences that are difficult to notice when inspecting one eye at a time. It is a practical comparison technique, not a guarantee of perfect symmetry. Natural differences between your eyelids may mean the two lines need slightly different placement to appear balanced.
For hooded eyes and monolids, the visible design may need to sit differently from a conventional wing. Plan the shape with the eyes open so the liner does not disappear into a fold. A small floating line or adjusted outer angle may be more effective than forcing a standard tutorial shape onto your anatomy.
The goal is visual balance, not identical measurements. Two anchor points provide structure while leaving enough flexibility to accommodate different eyelid shapes.
Once the design looks balanced, the remaining challenge is keeping its edges clean throughout the day. That depends as much on skin preparation and eyelid movement as on drawing technique.
Key takeaways before your next trend experiment
- Choose a trend based on its consequences: grow-out, daily styling requirements and potential damage matter more than the size of the visual change.
- A blended haircut or colour service may reduce maintenance, but neither is automatically reversible. Confirm the specific technique before committing.
- For a completely different look without altering your hair, graphic eyeliner offers an experiment you can remove the same day.
How Can You Wear Graphic Eyeliner That Looks Sharp for 6 Hours Without Smudging or Transfer?
Graphic eyeliner is more likely to remain sharp for six hours when you control eyelid oil, select a suitable long-wear formula and position the design where your skin will not repeatedly fold over it. Longevity is not guaranteed: hooded eyelids, humidity, perspiration and individual skin chemistry can all affect wear. Preparation and careful placement matter more than simply applying a thicker line.
Start by identifying the way your eyeliner normally fails. A line that blurs near the lash line may be interacting with natural skin oils or moisture. A mark that appears above the crease can indicate transfer from one eyelid surface to another. Fading at the outer corner may reflect rubbing, watering eyes or insufficient product adhesion.
Different problems call for different adjustments. Adding more eyeliner to an oily eyelid can make the result heavier without necessarily improving its durability.
For a more controlled application, try this layered approach:
- Prepare the eyelid. Remove excess skincare residue and allow products to settle. If suitable for your skin, apply a thin layer of eye primer designed to manage oil, or a light sweep of translucent powder.
- Choose the formula. Use an eye-safe long-wear liquid or gel eyeliner that provides sufficient precision for your graphic shape.
- Build controlled edges. Draw the design with short strokes, allowing the product to set before opening or moving the lid extensively.
- Refine the finish. Where appropriate, lightly set compatible areas with matching eyeshadow using a small precision brush. Avoid disturbing the crisp outline.
- Limit unnecessary transfer. If lower-lash mascara usually smudges, consider applying waterproof mascara only to the upper lashes, provided the product suits your eyes and removal routine.
These measures are practical makeup techniques, not a tested formula guaranteeing six-hour wear. Some eyeliners perform better on bare skin, while others work well over primer or powder. Check the manufacturer’s directions and test combinations before an important occasion.
Hooded eyelids require a placement adjustment. When the lid is heavily folded, a line drawn with the eyes closed may become partially hidden or distorted when they open. Map the graphic shape while looking straight ahead with relaxed, open eyes, then complete the design in small sections.
Makeup artist Patrick Ta‘s advice, discussed in Real Simple‘s makeup-artist advice for hooded eyelids and monolids, supports planning eye makeup where it remains visible when the eyes are open. That guidance concerns placement rather than a guaranteed wear time.
If transfer persists, consider simplifying the design so its main line avoids the areas where your eyelid folds or touches other skin. A small floating accent may provide more reliable visibility than a complicated shape crossing the crease.
Before a six-hour event, test the complete look on an ordinary day with similar conditions. Check the liner periodically to identify whether fading, smudging or transfer is your main issue. Avoid applying makeup to irritated eyes, sharing eye products or using cosmetic formulas not intended for the eye area.
Graphic eyeliner also completes the low-commitment spectrum: a short haircut may require months of growing out, balayage can leave lasting lightened sections, but an eyeliner look can be removed at the end of the day. It provides an opportunity to experiment with a stronger aesthetic before deciding whether you want a longer-lasting change.
Choose one change to try this week, whether that is a pinned-up fringe, a new air-dried parting or a graphic liner design. Photograph it in natural light, notice how comfortable you feel maintaining it and only then decide whether a haircut or colour appointment is worthwhile.
Can a haircut be reversed if you regret it immediately?
A haircut cannot immediately regain the length that has been removed. However, a stylist may be able to soften an unwanted shape, blend disconnected layers or suggest styling methods that make the cut more manageable. Longer layers are generally easier to disguise than very short fringe sections. Avoid rushing into an additional major cut before discussing your options with a professional.
Is a hair gloss completely damage-free?
No. The word “gloss” covers different products and services, including temporary shine treatments and chemical colour formulations. Their effects depend on their ingredients, your existing colour and the condition of your hair. A non-lightening gloss may avoid the risks associated with bleaching, but that does not make every gloss harmless or fully reversible. Ask which formula will be used and whether it changes your natural pigment.
What should you do if your natural texture does not match the hairstyle you want?
Ask your stylist to adapt the shape rather than reproduce the reference exactly. A similar silhouette may be possible with different layer lengths, weight distribution or fringe placement. Request examples on hair with a comparable texture and discuss how the cut will look without heated styling. If achieving the appearance requires frequent heat or chemical treatment, decide whether the maintenance and potential damage are acceptable.
Can balayage be removed without cutting your hair?
Lightened balayage sections can sometimes be recoloured to resemble your natural shade, but recolouring does not reverse the chemical alteration caused by lightening. Colour may fade or change tone, and further processing can place additional stress on fragile hair. A colourist can explain whether blending, toning or gradually growing out the highlights is the most suitable approach for your hair.
How can you experiment with a new look without cutting or chemically colouring your hair?
Try removable clip-in fringe pieces, temporary partings, accessories, low-tension updos or makeup changes such as graphic eyeliner. These alternatives can help you judge a new silhouette or aesthetic without permanently changing hair length or pigment. Use comfortable accessories, avoid excessive tension and remove styling products gently. For a realistic haircut preview, compare the temporary look with your natural texture and everyday routine.