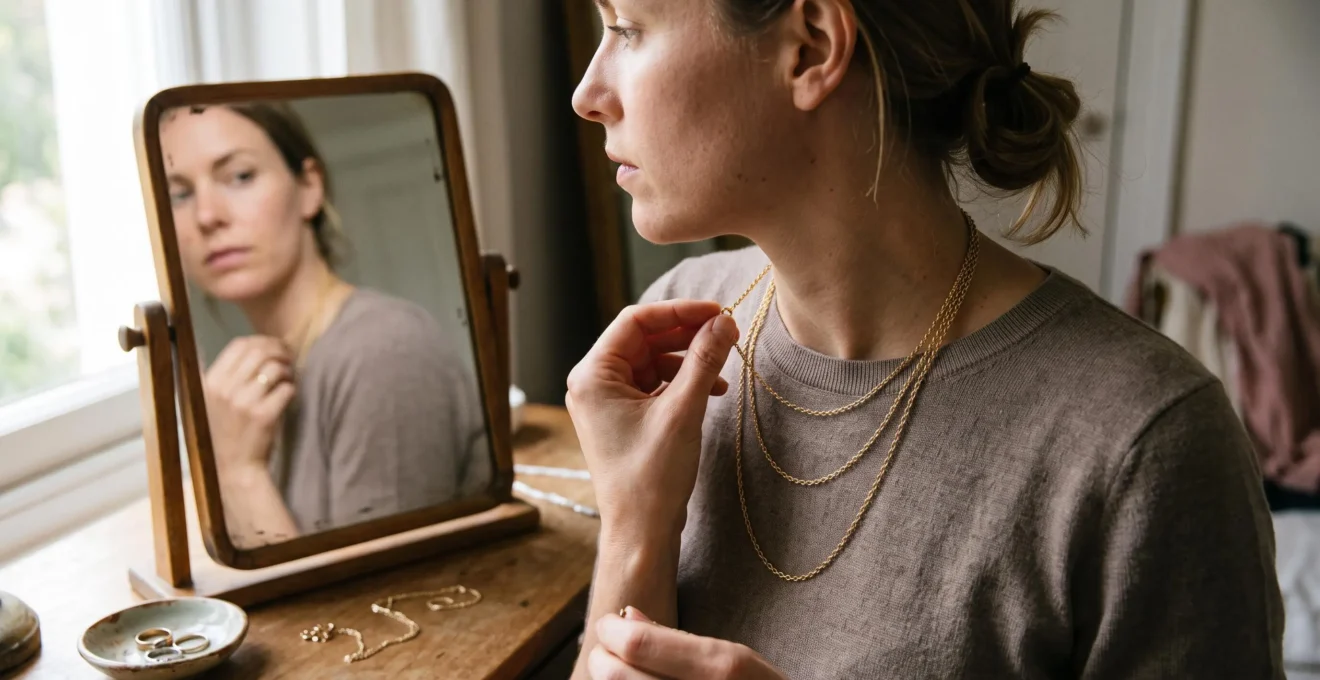
Three delicate necklaces can look perfectly arranged before work and become a tangled cluster by lunchtime. The problem is rarely just insufficient spacing. Fine chains move independently, clasps rotate, pendants shift, and clothing repeatedly changes how the strands sit against the neck.
To layer fine chains without constant readjusting, combine different necklace lengths, contrasting chain textures, controlled pendant weights, and discreet fastening hardware. Begin with approximately two inches between adjacent necklace lengths, then adjust the arrangement according to your neckline, daily movements, and the chains themselves.
A reliable workday combination usually needs fewer adjustments than a complicated stack of almost identical chains. The goal is not to prevent every millimetre of movement. It is to avoid the crossings, pressure points, and repeated friction that turn normal movement into knots or irritation.
The same principle extends to sculptural necklaces and thin rings: establish one focal piece, use quieter elements to support it, and test the complete arrangement during ordinary activities rather than judging it only in a mirror.
Fine-chain layering essentials for a comfortable workday
- Space and differentiate: try a two-inch difference between necklace lengths, then vary textures and pendant weights instead of relying on length alone.
- Control the hardware: choose flat, unobtrusive clasps and consider a layering connector for combinations worn regularly.
- Test the outfit: check necklaces against your actual work neckline, knitwear, desk posture, and natural movements before committing to the arrangement.
- Why Do Fine Chains Tangle So Easily Even When You Space Them Out?
- How to Layer 3 Fine Chains Using a 2-Inch Spacing Rule So They Stop Tangling
- Which Is Better to Prevent Tangles: Extenders, Layering Clasps, or a Multi-Strand Necklace?
- The Fine-Chain Layering Mistake That Snags Knitwear and Leaves Red Marks on Your Neck
- When Should You Shorten or Lengthen Layered Chains to Work With Winter Knits vs Summer Necklines?
- How to Style a Sculptural Necklace Using 3 Anchors So It Looks Intentional in Daylight
- How to Build a Ring Stack Using One Hero Ring and 2 Spacers So It Looks Clean
- How Can You Stack Thin Rings Without Looking Cluttered or Feeling Uncomfortable All Day?
Why Do Fine Chains Tangle So Easily Even When You Space Them Out?
Fine chains tangle because they are flexible, lightweight, and constantly moving against each other. Even necklaces that appear well separated at the front can overlap behind the neck as their clasps rotate. Gravity, pendant weight, clothing friction, and repeated head movements all affect how the strands settle throughout the day.
Consider two delicate chains hanging from separate clasps. Their front sections might fall at noticeably different heights, but their upper sections still occupy the same small area around the neck. As one clasp shifts towards the shoulder, its chain can cross the other strand. Repeated movement may then tighten that crossing into a knot.
Front-facing spacing does not guarantee separation behind the neck. The problem becomes more noticeable with similar chains because their small links can catch against each other once the strands overlap.
There are two useful patterns to distinguish:
- Pendant or clasp migration: a heavier pendant pulls one strand downward, or clasp hardware slides towards the front. Address the imbalance by checking necklace fit, pendant weight, and hardware position.
- Link-on-link tangling: two flexible chains wrap together during movement. Prioritise different textures, greater separation, or a compatible layering connector.
Chain construction matters as well. A delicate cable chain bends readily around obstacles. A smooth snake chain behaves differently because its surface and link construction are less visibly open, although it can still twist or kink. Neither construction is automatically tangle-proof.
Office routines introduce repeated movements that a short evening outing may not. Looking down at a laptop, leaning towards a second monitor, adjusting headphones, putting on a blazer, and removing a coat all change how necklaces rest against the neck and clothing.
A useful diagnostic test is to wear the combination for a normal workday and inspect it at several natural breaks. If the strands cross primarily behind the neck, changing the fastening arrangement may help more than making the front layers longer. If the pendants repeatedly slide sideways, investigate their weight and chain balance first.
Once the dominant movement pattern is clear, build the next arrangement around controlled spacing, different chain profiles, and a stable lower layer.
How to Layer 3 Fine Chains Using a 2-Inch Spacing Rule So They Stop Tangling
To layer three fine chains, begin with roughly two inches between adjacent necklace lengths, choose contrasting chain textures, and position the most substantial strand at the bottom. Check that the chains are not crossed when fastening them. The spacing is a styling starting point, not a guarantee against tangling during an entire workday.
Jewelers Mutual‘s necklace layering advice recommends experimenting with a two-inch difference, using varied textures and weights, and starting with three necklaces. These are practical styling recommendations rather than a scientifically established spacing threshold.
In jewellery sizing, the two-inch difference normally refers to the overall necklace lengths, not a measured two-inch vertical gap between the strands on your chest. For example, a hypothetical combination might use necklaces measuring 16, 18, and 20 inches. The actual visible separation depends on neck shape, pendant weight, and how each necklace hangs.
A balanced three-layer arrangement can follow this structure:
- Top layer: a short, lightweight cable chain that sits comfortably without gripping the neck.
- Middle layer: a delicate beaded or subtly textured chain, ideally without a bulky pendant.
- Bottom layer: a somewhat more substantial or structurally stable chain, potentially carrying the main pendant.
Placing the more substantial necklace lowest creates a visual anchor. It may also make the individual tiers easier to distinguish, although greater weight does not mechanically guarantee that strands will stay apart.
Before putting the necklaces on, lay them separately on a flat surface to check their lengths and inspect the clasps. Fasten each necklace individually, bringing its clasp to the front if that gives better visibility, then rotate it carefully into position without twisting the other strands.
Another practical option is to connect two compatible chains to a suitable layering attachment while leaving the third independent. Avoid linking ordinary chains together through improvised clasp arrangements that strain delicate end rings. Whatever fastening method you use, check the back of the neck in a mirror for hidden crossings.
Your five-step fine-chain workday test
- Measure the necklaces: record the length of each chain and the difference between adjacent lengths.
- Assign each layer a role: note which necklace is shortest, which provides texture, and which acts as the lower anchor.
- Inspect the fastenings: confirm that each clasp is secure and record whether any chains cross behind the neck.
- Wear the arrangement through normal activities: note the first activity or time when twisting, slipping, or snagging appears.
- Change one variable and retest: adjust one length, texture, or fastening method, then compare the resulting tangles and readjustments.
The final step is particularly useful because changing several elements at once makes it difficult to identify what improved the arrangement. A record of necklace lengths and the first problem encountered gives you a repeatable starting configuration.
If length and texture adjustments still leave persistent crossings, the next decision concerns the hardware holding the layers in place.
Which Is Better to Prevent Tangles: Extenders, Layering Clasps, or a Multi-Strand Necklace?
A layering clasp is often the most practical choice for frequently worn combinations of separate fine chains, while extenders offer greater flexibility for occasional styling. A purpose-built multi-strand necklace can simplify everyday dressing. None of these options guarantees zero tangles: the best choice depends on how often you change your necklaces, their combined weight, and your comfort with shared hardware.
These accessories solve different problems. An extender changes the length of an individual necklace. A layering clasp connects multiple necklaces through shared fastening hardware. A multi-strand necklace is designed as a coordinated piece, although individual strands may still move or cross.
| Decision factor | Extenders | Layering clasp | Multi-strand necklace |
|---|---|---|---|
| Length flexibility | High, for compatible chains | Depends on the connector and individual chains | Usually limited by the design |
| Morning setup | Individual necklaces still need fastening | Several chains can be attached as one group | Usually one coordinated fastening arrangement |
| Tangle management | Improves spacing but does not control crossings | Can reduce clasp migration and crossing, depending on design | Depends on strand construction and attachment points |
| Hardware concerns | Additional joins and dangling components | Shared connector may feel bulky or concentrate tension | Shared components can be harder to replace separately |
| Best suited to | Occasional combinations and neckline changes | Regular layering of interchangeable necklaces | A consistent, ready-made workday look |
Extenders preserve independence. You can change the spacing without replacing the chain, making them useful when the same necklace is worn with different necklines. However, a bulky extender joint may catch on fine knitwear, and any threaded or adjustable attachment needs regular checking for loosening.
Layering clasps simplify repeated combinations. Multiple chains attach to one coordinated fastening system, reducing the number of independent clasps that can move around the neck. The trade-off is that a shared connector becomes a common point of dependence. If it opens or breaks, more than one necklace may be affected.
Not every layering clasp physically separates the chains along their full lengths. Some simply organise the ends. This distinction matters when choosing a connector specifically to prevent knots rather than merely make the necklaces easier to put on.
Weight also matters. Combining several heavy necklaces on a small connector may create uncomfortable pulling or pressure. Choose hardware compatible with the chains’ end fittings and intended loads rather than assuming that a connector suitable for delicate jewellery can hold any combination.
A multi-strand design reduces the need to coordinate several separate necklaces every morning. Its limitation is reduced personalisation: you cannot necessarily separate the strands or reuse each one independently. It is a reasonable choice when consistency matters more than creating different combinations.
Whichever option you choose, its hardware must also work comfortably against the skin and the clothing worn throughout the day.
The Fine-Chain Layering Mistake That Snags Knitwear and Leaves Red Marks on Your Neck
The most easily overlooked layering mistake is placing several bulky or protruding clasps together at the back of the neck, particularly beneath knitwear. These fittings can catch fabric, create localised pressure, and encourage repeated friction. However, red marks are not always caused by clasp pressure: skin sensitivity, irritation, and metal allergy must also be considered.
A combination of individually attractive necklaces can produce an awkward cluster of hardware. Large lobster clasps, T-bars, decorative closures, extension loops, and dangling chain ends may sit comfortably against bare skin but interfere with a tightly knitted collar.
When the wearer turns their head or adjusts a jumper, the fittings can pull against nearby stitches. This is especially troublesome when the clasp has a projecting lever, an unfinished edge, or an extension tail that moves independently.
Rather than automatically replacing every necklace, examine the back-of-neck arrangement:
- Check whether several clasps are gathering in one small area.
- Look for protruding edges, loose chain tails, and components that catch fabric.
- Compare flat, well-finished closures with bulkier decorative hardware.
- Reduce unnecessary weight if the combination feels as though it pulls against the neck.
Persistent redness should not be dismissed as an ordinary consequence of wearing jewellery. DermNet‘s information on jewellery allergy explains that nickel and cobalt can cause allergic contact dermatitis, while friction and other irritants may also produce skin reactions.
Itching, persistent redness, blistering, or recurring irritation warrants removing the jewellery and seeking appropriate medical advice. A visible mark alone does not identify whether pressure, friction, or allergy is responsible.
For a clothing compatibility test, start with the jewellery off and inspect how the jumper passes over the neck. Put the garment on, fasten the necklaces, and gently check where the fabric sits against each chain. If you want to test removal, support the necklace and move the fabric carefully rather than forcing knitwear over exposed jewellery fittings.
Turtlenecks and scarves deserve special treatment. Sometimes the easiest solution is to wear a single short chain at a comfortable, visible height, rather than trying to keep several delicate strands underneath a moving collar. Another possibility is to wear an appropriate necklace over the garment, provided its length and fittings do not snag the fabric.
Once the hardware is under control, seasonal neckline changes become a matter of adjusting where each chain sits relative to the fabric.
When Should You Shorten or Lengthen Layered Chains to Work With Winter Knits vs Summer Necklines?
Adjust layered necklace lengths when a garment’s neckline changes where the chains rest or causes them to catch, disappear, or overlap. For winter knitwear, keep delicate strands clear of problematic collar edges or choose a necklace designed to sit over the fabric. For summer necklines, longer lower layers can create definition, provided they remain comfortable and stable during movement.
Necklace length should be considered alongside the garment rather than chosen in isolation. Jewelers Mutual’s necklace length and neckline recommendations describe different approaches for V-necks, round necklines, button-up shirts, and turtlenecks.
The important distinction is between where a necklace looks balanced and where it can move without repeatedly catching or disappearing beneath clothing.
For a winter outfit, a short chain can sometimes sit above an exposed collar edge, while a longer statement necklace may work over a smooth turtleneck. Delicate chains worn between the neck and a heavy knit may be harder to inspect and more likely to become caught during dressing.
For summer clothing, the lower necklace can extend further into an open neckline. A V-neck often accommodates vertically descending layers that echo its shape, while a scoop neck can support a relatively compact arrangement above the fabric edge.
Instead of relying exclusively on standard necklace lengths, use your most frequently worn work garment as a reference. Put it on, identify the neckline’s lowest point, and measure its approximate position relative to the base of your neck. Then try your necklace combination and observe whether the lowest tier falls above, across, or below the fabric edge.
For example, someone who regularly wears an open-collar blouse might find that the middle necklace falls exactly against the shirt opening. In this hypothetical situation, a small length adjustment could reposition the chain onto exposed skin or fully over the fabric, reducing repeated contact with the edge.
Material also affects the decision. Open, textured knits provide more opportunities for jewellery components to catch than many smooth, tightly constructed fabrics. This is a practical observation, not a quantified comparison establishing that one fabric will always snag more than another.
Sometimes the solution is not changing all three lengths. Moving the outermost necklace so that it rests entirely on one surface, or simplifying the stack, may be more useful than repeatedly adding extenders.
Button-up shirts introduce another consideration. A pendant that sits directly over buttons can move awkwardly when leaning forward, while a shorter combination inside an open collar may remain visually contained. Check whether the arrangement works when seated as well as standing.
With the practical relationship between jewellery and clothing established, the next styling challenge is creating an intentional focal point without sacrificing stability.
How to Style a Sculptural Necklace Using 3 Anchors So It Looks Intentional in Daylight
A sculptural necklace looks intentional when the outfit has three clear anchors: one dominant vertical focal point, one contrasting material or texture, and one subtle visual echo elsewhere in the jewellery. In daylight, check that the main piece remains visually dominant and that supporting chains do not compete with its shape, reflection, or movement.
The first anchor is the vertical focal point: a pendant, architectural collar, or sculptural necklace with a clearly defined position. Choose its height relative to the neckline before adding any delicate supporting chains.
The second anchor is material contrast. If the sculptural piece has a broad polished surface, a very fine cable chain or small beaded strand can create a deliberate difference in scale. The supporting necklace should remain visually quieter rather than duplicating the main piece’s volume.
The third anchor is an echo elsewhere. A simple earring or bracelet may repeat the curve, finish, or metal of the focal necklace. This connection can make the full outfit feel coordinated without requiring another statement piece.
Daylight provides a useful styling check because a polished necklace may reflect more strongly near a window than it does under soft indoor lighting. Shadows can also reveal whether overlapping chains appear cluttered around the sculptural form.
A practical way to assess the arrangement is to look at it first from conversational distance, then closer in a mirror. If several details compete equally for attention, remove one rather than continuously rearranging all the pieces.
One strong necklace is usually enough to establish the focal point. The fine chains should support that role through contrast or framing. Avoid adding large pendants to every tier simply to make each necklace individually noticeable.
There can also be a practical advantage to choosing a relatively stable sculptural design. A flat, well-positioned element may create visible separation between adjacent strands, although its effect depends on construction and movement. It should not be treated as a mechanical substitute for a dedicated anti-tangle connector.
Check whether the sculptural piece rotates when you lean forward. If it repeatedly flips or pulls other chains out of alignment, reconsider its pendant balance, chain length, or position in the arrangement.
That same hierarchy can be carried into rings, where one expressive piece and quieter supporting bands create visual structure on a smaller scale.
How to Build a Ring Stack Using One Hero Ring and 2 Spacers So It Looks Clean
Build a clean ring stack by choosing one hero ring as the focal point and placing two slimmer, simpler bands around it, provided the combination fits comfortably. The supporting rings should create visual breathing room rather than compete with the central piece. Consider how the stack feels while typing, gripping objects, and bending the finger.
The hero ring may have a sculptural profile, larger setting, or distinctive surface. Its role is similar to that of the main necklace in a layered arrangement: it provides a single point of interest.
Choose two smoother, narrower bands to frame it. A plain rounded band or flat-profile ring can offer contrast against a textured hero ring without introducing additional protruding details.
An illustrative width hierarchy is:
- Centre: one visually dominant ring with a comfortable, stable fit.
- First spacer: a slimmer band that separates the central design from neighbouring details.
- Second spacer: another simple band that balances the composition without making the stack overly bulky.
These are styling roles, not prescribed measurements. The appropriate widths depend on finger length, knuckle shape, ring construction, and personal comfort.
For someone using a keyboard frequently, the index or middle finger may offer a visually prominent place for the signature ring. However, either placement can interfere with typing or handling objects depending on the ring and the person’s hand movements. Test the chosen finger rather than assuming one position is universally best.
Physical contact between rings deserves attention. Two textured bands may rub against each other during ordinary movement, potentially creating surface wear. Smooth spacers can reduce some direct contact between detailed elements, though they cannot eliminate all metal-on-metal rubbing.
A spacer also needs to fit properly. A loose ring can rotate independently, while a tight ring may press against adjacent bands. Do not rely on neighbouring rings to hold an incorrectly sized piece securely in position.
If the central ring already has substantial height or texture, the two supporting bands should usually be simpler. This keeps the arrangement legible and reduces the number of raised edges that might contact fabric or nearby fingers.
The final decision is not only how the stack looks but whether its combined width and fit remain comfortable across the entire working day.
Key takeaways before completing your jewellery look
- Assess the combined width and pressure of rings rather than choosing a stack solely by the number of pieces.
- Decide whether one finger or two fingers offer better comfort during your normal hand movements.
- Coordinate rings and necklaces around one dominant sculptural feature, leaving the remaining elements visually restrained.
How Can You Stack Thin Rings Without Looking Cluttered or Feeling Uncomfortable All Day?
Stack thin rings comfortably by limiting their combined width, selecting compatible profiles, and keeping enough room for natural finger movement. A balanced arrangement can place several narrow bands on one finger or distribute them across two. If a stack pinches, causes pain, or restricts movement, simplify it rather than forcing the fit.
Thin rings may look lightweight individually, but their effects accumulate when several are worn together. The combined width can change how the finger bends, particularly if the bands sit close to a joint or have raised settings.
There is no universal number of rings that guarantees comfort. Three very narrow, smooth bands may feel different from three wider rings with textured edges, even though both arrangements contain the same number of pieces.
Before wearing a stack to work, perform two simple comfort checks. Close your hand gently into a fist and confirm that no band pinches or restricts the movement. Then hold a mug or another everyday object and assess whether the rings create uncomfortable pressure between your fingers.
For a more distributed appearance, try wearing two rings on one finger and one or two on an adjacent finger. This may reduce the sense of bulk compared with placing everything on one finger, although adjacent rings can still touch, produce noise, or interfere with gripping.
Fit can change during the day. Fingers may become temporarily larger or smaller as temperature and other conditions change. A ring that feels comfortable in the morning should still be easy to remove later without discomfort.
Automatically choosing a half-size larger ring is not a reliable rule. Larger rings can slip or rotate, and the correct size depends on the specific stack and the finger. Consider professional sizing advice if your preferred combinations repeatedly feel too tight or unstable.
For pain or swelling, comfort takes precedence over styling. The NHS guidance on finger pain advises removing jewellery from a painful finger and seeking appropriate assessment when symptoms persist or worsen. A ring that becomes difficult to remove alongside swelling or pain needs prompt attention.
The final visual check should include both hands and the neckline. If the necklace is already sculptural, use slimmer, quieter rings. If the ring is the main statement, keep the layered necklaces delicate and relatively simple.
For the office, observe the arrangement while typing, reaching for objects, wearing a coat, and washing and drying your hands. The ideal stack is not the one that looks most elaborate in a photograph, but the one that continues to feel natural in daily use.
For your next workday, choose three necklaces with distinct lengths and textures, keep the clasps organised, and wear the combination with your usual outfit. Add one comfortable ring focal point, then make only the adjustments your actual movements show are necessary. A repeatable arrangement is more useful than a complicated one that needs constant correction.
Can a necklace layering clasp prevent every tangle?
No. A layering clasp can organise necklace ends and reduce some crossings, but loose strands may still contact one another as you move. The result depends on the connector’s design, chain textures, lengths, and pendant weights.
Is it safe to sleep in several delicate necklaces?
Removing delicate layered necklaces before sleeping is a sensible precaution. It avoids prolonged twisting, accidental pulling, and unnecessary contact with bedding. Store the chains separately and close their clasps to make them easier to arrange the following morning.
How can you stop a delicate pendant from flipping backwards?
First check whether the pendant hangs centrally when the chain is straight and its clasp is positioned correctly. If it repeatedly rotates, the pendant’s shape, attachment point, or weight distribution may be responsible. Changing the necklace length or selecting a more stable pendant construction may help, but no adjustment guarantees that every design will remain facing forward.
Should fine chains be stored together or separately?
Separate storage is usually easier for delicate chains. Use individual compartments, suitable necklace organisers, or separate soft pouches to limit contact between strands. Fasten each clasp before storing and check that no links are already twisted or caught.