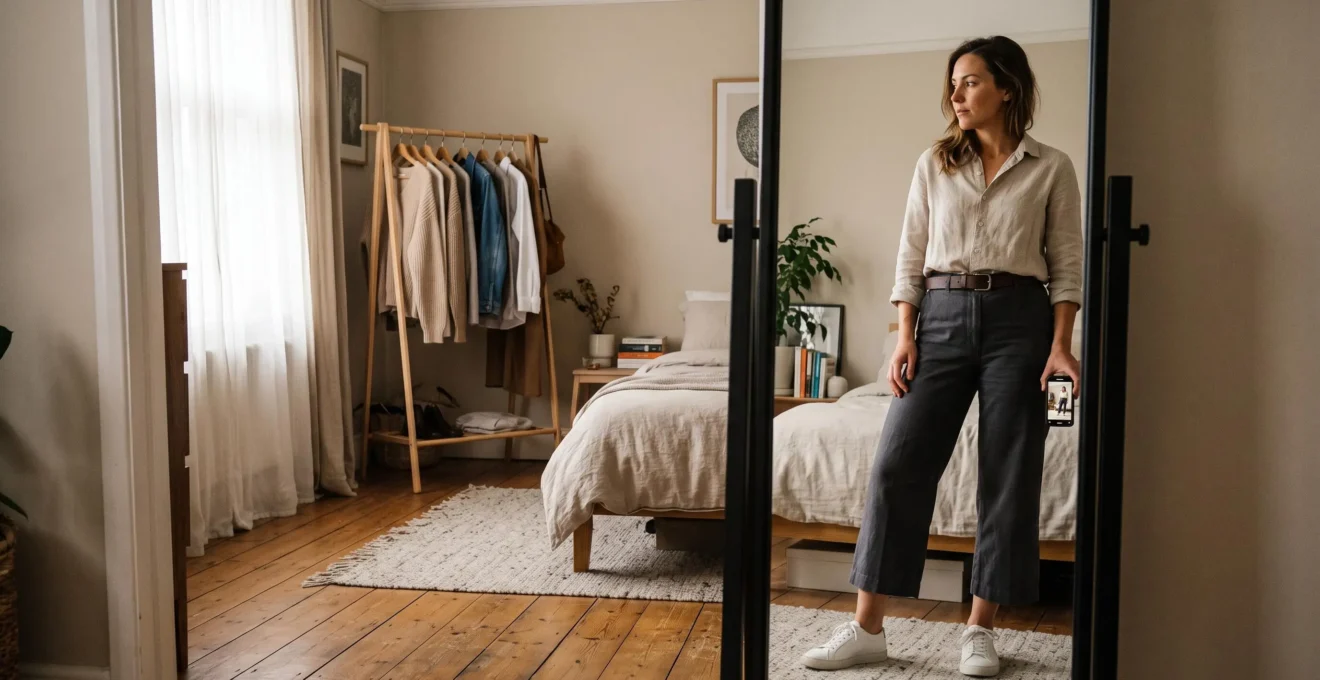
An outfit can fit comfortably everywhere and still look strangely unbalanced. The trousers sit correctly, the shirt fits across the shoulders, and the shoes complement the clothes. Yet something about the full silhouette feels wrong.
Often, the missing piece is visual proportion: the relationship between where garments begin and end, how their volumes interact, and where the eye encounters horizontal or vertical breaks. A shirt ending at the hip, a waistband hidden beneath it, and trousers cropped at an awkward point can create several competing divisions, even when every garment fits properly.
Fixing that impression does not necessarily require different clothes. Start by identifying three landmarks: the bottom of your top, the visible starting point of your bottoms, and the lower hem. Then adjust one element and compare the complete silhouette.
The objective is not to force every body into a particular ratio. It is to identify why an outfit communicates a different shape from the one you intended, then make a small, testable correction.
Outfit proportion fixes at a glance
- Check three landmarks: locate your top hem, visible waistline, and trouser or skirt hem before changing anything.
- Choose a visual division: try an approximate one-third/two-thirds balance for length, or an intentional 50/50 split for stronger symmetry.
- Change one variable: test a tuck, waistband adjustment, layer, or hem position and compare full-length photos under similar conditions.
- Why Can Outfit Feel Wrong Even When Every Item Fits You Perfectly?
- How to Use a 3-Point Proportion Check to Fix an Outfit in Under 2 Minutes
- Which Looks Better on You: Rule of Thirds Proportions or an Intentional 50/50 Split?
- The Hem-Length Mistake That Makes Legs Look Shorter Even With the Right Shoes
- A One-Variable Rule That Helps You Fix Proportions Without Creating 3 New Problems
- How to Build a Clean Vertical Line in an Outfit Without Wearing All Black or Tight Clothes?
- How to Choose the Right Hem and Rise for Wide-Leg Trousers So They Don’t Drag or Twist
- How Can You Wear Wide-Leg Trousers Without Looking Shorter or Swamped After 5 Minutes Walking Outside?
Why Can Outfit Feel Wrong Even When Every Item Fits You Perfectly?
An outfit can feel wrong despite perfect individual fit because fit and visual proportion are different qualities. Fit describes how clothing sits and moves on your body; proportion describes how its visible lengths, shapes, and volumes relate to one another. Several well-fitting pieces can create an overall silhouette that feels fragmented or visually heavier than intended.
Imagine a hypothetical combination of a correctly sized shirt, straight-leg trousers, and comfortable ankle boots. The shirt ends at the widest part of the hips, concealing the waistband. The trousers expose a narrow strip of ankle, and the boots introduce another strong horizontal boundary.
No individual piece needs replacing. However, the combination creates several visual stopping points, making the outfit read as separate blocks rather than one coordinated silhouette.
According to Utah State University Extension‘s clothing design principles, proportion concerns the size and spatial relationships between design elements. Balance also depends on how visual weight is distributed through line, color, texture, and emphasis.
This helps explain why the same shirt can look balanced with one pair of trousers and awkward with another. Changing the bottom alters the relationship between the garment lengths, even when the shirt’s physical fit stays identical.
The full-length mirror matters because a close-up fitting check tends to isolate garment details. Examining shoulders, waist comfort, or trouser seams individually tells you relatively little about how the complete silhouette is divided.
Try viewing the complete outfit from a few steps away, then taking a straight-on photograph with the camera approximately level and far enough away to avoid obvious perspective distortion. Compare where your eye naturally stops.
The diagnostic question is not whether the clothes fit, but where the outfit creates its strongest visual divisions. A pronounced break at the hips, for example, can become the main feature of an otherwise understated look.
Once the problem is understood as a relationship between garments rather than a problem with your body, it becomes easier to identify a specific correction. The next step is to locate the three boundaries most likely to influence that relationship.
How to Use a 3-Point Proportion Check to Fix an Outfit in Under 2 Minutes
The three-point proportion check examines where your top ends, where your bottoms visibly begin, and where the lower hem falls. Together, these landmarks reveal how your outfit divides the torso and legs. By comparing them in a full-length reflection or photograph, you can identify one adjustment worth testing without rebuilding the entire outfit.
The check can often be attempted in roughly two minutes when a mirror, camera, and existing outfit are ready. That is a practical time target, not a scientifically validated speed guarantee.
Start with the following landmarks:
- Top endpoint: identify whether your shirt, jumper, or jacket finishes at the waist, upper hip, lower hip, or mid-thigh.
- Bottom starting point: locate the visible waistband or the point where the lower garment appears to begin. Note that the actual trouser rise may be hidden beneath an untucked top.
- Lower hem: observe where your trousers or skirt end relative to your lower leg, ankle, and shoes.
These points are not measurements of anatomical correctness. They are reference lines for comparing visible garment boundaries.
Stand naturally, keep your posture relaxed, and take a full-length photograph. Identify the dominant horizontal divisions, paying particular attention to closely spaced boundaries that draw attention to the same area.
Two lines occurring near each other are not automatically a problem. The relevant question is whether their combined effect interrupts the length or balance you want to create.
For example, if an untucked shirt obscures a high waistband, temporarily tuck its front section. This moves the visible boundary upward without changing the trousers. If the resulting silhouette feels more coherent, the shirt’s apparent length was a useful variable to identify.
If the upper body already feels balanced but the legs appear interrupted, focus instead on the lower hem. Temporarily fold it inward to preview a different length, without treating that fold as a permanent alteration.
Your five-action outfit proportion checklist
- Take a straight-on, full-length photograph. Deliverable: one baseline image showing your complete outfit and shoes.
- Identify the top endpoint. Deliverable: a marked or noted position such as upper hip or mid-thigh.
- Identify the visible waistline and lower hem. Deliverable: two additional reference positions recorded on the same image or in notes.
- Make exactly one reversible adjustment, such as a front tuck. Deliverable: a second full-length photograph showing that change.
- Compare the two photographs at the same viewing size. Deliverable: a decision to keep, reverse, or test a different single adjustment.
Not every boundary needs changing. The aim is to identify the most influential one first, then decide whether the overall silhouette needs a longer-looking division or a deliberately balanced split.
Which Looks Better on You: Rule of Thirds Proportions or an Intentional 50/50 Split?
The rule of thirds often works when you want one part of an outfit to appear longer than the other, while an intentional 50/50 split creates a more symmetrical, graphic effect. Neither is universally better. Choose according to the visual result you want, where your waist naturally sits, and how strongly your garments define their dividing line.
The rule of thirds is a familiar styling guideline: position the main visual break around one-third or two-thirds of the overall outfit rather than at its midpoint.
Fashion writer Jess Cartner-Morley illustrates this approach in The Guardian’s explanation of the rule of thirds, including examples involving tucked tops, contrasting colors, belts, and jacket lengths.
The positions are approximate visual references, not compulsory anatomical measurements or scientifically established ideal ratios.
To decide which approach serves your outfit, compare their different effects.
| Decision point | Rule of thirds | Intentional 50/50 split |
|---|---|---|
| Visual structure | One section is noticeably longer. | Upper and lower sections appear approximately equal. |
| Typical effect | Creates direction and a stronger length contrast. | Creates symmetry and a pronounced horizontal division. |
| Useful when | You want to emphasize the length of your legs or upper body. | You want a graphic, architectural, or deliberately balanced silhouette. |
| How to create it | Shift the main break with a tuck, jacket length, or visible waistband. | Define the midpoint with contrasting fabrics, colors, or a belt. |
| Potential drawback | An exaggerated division may make one section look disproportionately compressed. | An unplanned midpoint may make the outfit appear visually static. |
A hypothetical example makes the difference clearer. Picture a cream shirt and navy trousers. With the shirt tucked high, the visible trousers occupy most of the silhouette, producing a thirds-inspired division.
Leave the shirt untucked to approximately mid-body and the two color blocks may appear closer to equal lengths. That could feel accidental if the hems and volumes do not relate clearly.
However, adding a deliberately placed contrasting belt or choosing a structured jacket that ends at the intended midpoint can make the same visual split feel purposeful.
A successful 50/50 outfit is not a failed rule-of-thirds outfit. It follows a different design objective.
Test both versions from the same camera position. If your goal is perceived leg length, compare which arrangement gives the legs a longer uninterrupted visual path. If your goal is geometric balance, examine whether the two halves look deliberately related.
Once the preferred division is clear, look at the finishing points lower down. Even a well-chosen waistline can lose its intended effect when the trouser or skirt hem introduces an awkward additional break.
The Hem-Length Mistake That Makes Legs Look Shorter Even With the Right Shoes
A hem can make legs appear shorter when it introduces a strong horizontal interruption that visually divides the lower leg. The effect depends on garment width, contrast, footwear, and the intended silhouette. Shoes may soften or reinforce the interruption, but changing the hem position is often a more direct way to adjust where the eye perceives the leg ending.
Consider cropped trousers that finish around the middle of the calf. The exposed lower leg becomes a separate visible segment, particularly when the trousers contrast strongly with the skin or hosiery.
This is not automatically unflattering. It may work especially well when the cropped shape is an intentional design feature. The problem arises when the visible interruption contradicts your aim of creating a longer-looking leg line.
New Mexico State University‘s Fashion Feasibility publication explains how garment lines, contrasting colors, and their placement influence perceived body proportions. Its discussion of optical effects provides a useful basis for evaluating hems, although it does not establish one universally flattering calf or ankle position.
When assessing lower hems, divide the visible leg into three practical regions:
- Below the knee: a relatively high break that can emphasize the cropped nature of a garment.
- Calf: a more conspicuous intermediate boundary, particularly with wide or contrasting hems.
- Ankle: a lower break that can preserve more of the trouser’s visual length, depending on the shoe opening and garment shape.
These regions are starting points for comparison, not rules about which parts of the leg should be exposed.
For straight-leg trousers, a hem near the ankle may create a relatively continuous line. For wide-leg trousers, a longer hem approaching the shoe can allow the fabric to fall in a more complete column.
A narrower cropped trouser may look intentional at a shorter length, whereas an equally short wide-leg trouser may create a much broader horizontal boundary.
Footwear changes the effect, too. A low-contrast shoe may visually continue the exposed leg, while a contrasting boot can introduce another clear division. A heel changes physical elevation and can affect how the hem hangs.
However, thicker soles or heels are not universal solutions. If a particular trouser length only looks balanced when standing on a specific shoe, the outfit may need reassessment when worn with a different pair.
Evaluate the hem while standing and moving, because fabric can shift around the ankle with each step. When several possible lengths look plausible, adjust only one at a time so you can identify the effect accurately.
A One-Variable Rule That Helps You Fix Proportions Without Creating 3 New Problems
The one-variable rule means changing just one styling element at a time, then checking the complete silhouette before making another adjustment. You might alter the visible waistline, top length, lower hem, or volume distribution. This controlled comparison helps identify what actually improves the outfit instead of confusing the results of several simultaneous changes.
It is a practical troubleshooting method, not a scientifically validated formula for better dressing.
Imagine an outfit with a long, loose jumper and wide-leg trousers. The overall silhouette feels heavy. You shorten the visible jumper length with a tuck, switch to higher shoes, add a belt, and change your jacket simultaneously.
The final outfit may look different, but you cannot easily tell which modification mattered most. You have also introduced several new relationships between garments.
Instead, start with the highest-impact variable.
- Choose the most noticeable issue in the baseline photograph: apparent torso length, visible leg length, or volume distribution.
- Make a single reversible adjustment that addresses that issue.
- Take a new photograph from the same position, with similar posture and lighting.
- Compare the overall silhouette, not merely the adjusted garment.
- Keep or reverse the change before testing another variable.
There is an important distinction between changing one variable during a test and believing that clothing elements work independently. They do not.
A tuck, for instance, moves the visible starting point of your trousers without physically changing their rise. That can make the leg line look longer while also exposing a belt, changing the amount of fabric gathered at the waist, or emphasizing the contrast between upper and lower garments.
Similarly, adding a structured jacket can create a clearer shoulder line but may make an already voluminous outfit appear broader than intended.
Those secondary effects are precisely why the whole outfit should be reassessed after every change.
You do not need a complex measurement system. A pair of similarly framed photographs and a simple preference—such as “the second version has a clearer waistline”—is enough to make the comparison useful.
Avoid interpreting that preference as an objective attractiveness score. The purpose is to identify which version better matches your intended shape and style.
Once you can identify the effect of individual adjustments, you can tackle more subtle silhouette issues, including how to create visual length without relying on dark colors or tightly fitted garments.
How to Build a Clean Vertical Line in an Outfit Without Wearing All Black or Tight Clothes?
A clean vertical line comes from visual continuity rather than dark colors or body-hugging garments. You can create it by combining related colors, controlling horizontal breaks, and using garment openings or fabric drape to guide the eye downward. Loose, colorful outfits can achieve the same effect when their lines and volumes support a continuous silhouette.
The principle is straightforward: the eye follows relationships between clothing elements. A long, uninterrupted boundary or repeated tonal connection can encourage a vertical reading, while a sharply contrasting horizontal division may interrupt it.
This does not mean avoiding contrast entirely. It means deciding where contrast should attract attention.
One option is tonal dressing. Combine garments from a related color family, such as stone, oatmeal, and warm beige, or pale blue with deeper denim shades.
Unlike strict monochrome, tonal dressing allows differences in hue, texture, and saturation. The shared color family can reduce the dominance of a single boundary without eliminating visual interest.
Another option is to create an open vertical column through layering. For example, wear a light knit top and similarly colored trousers beneath an unbuttoned overshirt or long cardigan.
The exposed inner garments form one continuous central area, while the open outer layer creates two longer side boundaries. The same principle can work with bright colors and relaxed fits.
Accessories can reinforce the direction of the eye, although they are not a substitute for coherent garment lines. A scarf hanging vertically, an elongated necklace, or a bag with a relatively unobtrusive strap can contribute to the composition.
Placement matters more than the mere presence of an accessory. A large contrasting bag positioned across the middle of the torso, for example, may introduce a new emphasis at exactly the point where you intended continuity.
Fabric structure also affects the outcome. A loose garment with a controlled shoulder and a relatively straight fall can maintain a clear outline without gripping the body. A fabric that gathers unpredictably around the hips may interrupt that line despite being similarly colored.
To assess the result, view a smaller version of your full-length photograph. At reduced size, minor details become less prominent, making the dominant blocks and directions easier to notice.
You can also gently blur a copy of the image as an informal visual experiment. This is a styling aid, not a validated measurement technique. Check whether your eye still follows a consistent line from the upper body toward the feet.
Vertical continuity becomes especially useful with wide-leg trousers, where both the waistband and lower hem strongly influence how the fabric’s width is perceived.
How to Choose the Right Hem and Rise for Wide-Leg Trousers So They Don’t Drag or Twist
Choose the rise and hem of wide-leg trousers by evaluating where the waistband sits, how the fabric falls over your shoes, and whether the legs behave properly during movement. A suitable hem should create your intended silhouette without repeatedly catching beneath your footwear or dragging along the ground. Persistent twisting may indicate a construction issue rather than incorrect length.
Begin with the rise. This is the distance built into the trousers between the crotch seam and waistband, which influences where the garment sits on the body.
A higher visible waistband can create the impression of a longer lower-body section. A lower rise shifts the apparent starting point downward, potentially changing how the same trouser width and hem length read visually.
However, rise does not automatically determine the correct hem length. Two pairs with different rises can have similar inseams, and the waistband may sit differently depending on the cut and fit.
Evaluate the complete garment rather than assuming a higher rise permits additional fabric at the floor.
The next consideration is the position of the trouser hem relative to the shoe. Different combinations call for different visual results.
| Footwear | Useful starting point | What to check in motion |
|---|---|---|
| Flat leather shoes | A hem that clears the ground while maintaining the intended drape. | Whether the fabric becomes trapped beneath the heel. |
| Trainers with thicker soles | A length assessed against the actual sole thickness and shoe shape. | Whether the front hem repeatedly catches or bunches on the shoe. |
| Heeled shoes | A length that looks balanced at the intended heel height. | Whether the trousers remain wearable when standing and walking. |
These are fitting checks rather than universal clearance measurements. The right amount of fabric above the ground varies with the intended cut, material, and shoes.
Check your trousers standing naturally, then walk at a normal pace, turn, and climb a few steps. Observe whether the leg openings remain clear of the floor and whether the fabric falls back into a comfortable position.
Twisting requires a separate diagnosis. It may result from grainline alignment, pattern construction, fabric behavior, or changes to the garment after washing.
In Threads’ technical tutorial on jeans pattern construction, technical designer Raminta Vilkiene explains the importance of aligning the grainline through the knee and hem to help prevent trouser-leg twisting.
That guidance concerns jeans construction, but it highlights why rotating seams cannot reliably be corrected by choosing taller shoes or simply shortening the hem.
When a trouser leg persistently twists, inspect whether its seams rotate while the waistband remains correctly positioned. A tailor can then assess whether the issue is alterable or inherent to the cut and construction.
A pair that looks balanced in a fitting-room mirror should also survive an ordinary walk. This movement test is particularly important when the leg openings are wide enough to change shape noticeably as you move.
What to remember before the walking test
- A clearly positioned waistband or structured upper garment can provide a visual reference for the volume below.
- Hem length should be assessed in real movement, not only in a static mirror pose.
- If the silhouette becomes unstable while walking, identify whether the cause is styling, excess fabric, or trouser construction before making alterations.
How Can You Wear Wide-Leg Trousers Without Looking Shorter or Swamped After 5 Minutes Walking Outside?
Wide-leg trousers remain visually balanced in motion when the upper body provides a clear reference point, the hem stays controlled, and the fabric moves without overwhelming the silhouette. Start with a visible waistline or structured shoulder, then observe how the trouser legs swing during a normal walk. Adjust the apparent proportions before assuming the trousers are too wide.
Standing still presents a relatively stable shape. While walking, the material shifts forward and backward, and each trouser leg may spread, fold, or briefly overlap the other.
This movement can change how much volume you perceive around the lower body. An outfit that appears streamlined in the fitting room may therefore look very different outdoors.
The solution is not necessarily to wear a tight top. It is to establish a clear visual anchor above the trousers.
A tucked shirt can reveal the waistband, creating a defined transition between the torso and legs. A structured shoulder can establish a controlled upper outline, even if the top itself is relaxed.
Likewise, a shorter jacket can expose more of the trousers and alter their apparent length. A longer open jacket may work differently, creating vertical boundaries alongside the wide-leg fabric.
Consider a hypothetical outfit with very wide cream trousers and an oversized cream shirt. If both garments have soft, undefined edges, the silhouette may appear as one large moving volume.
Partially tucking the shirt introduces a visible waist reference without changing the trousers. Alternatively, leaving the shirt loose beneath a structured open layer may create a clearer outline through contrast in shape rather than tightness.
The relationship between trouser width, visible rise, and hem length is particularly important. As the apparent width increases, the horizontal boundary at the bottom becomes more noticeable, especially if the trousers stop abruptly above contrasting footwear.
A longer, controlled drape can create a different effect, but only if the hem remains clear of the ground and does not interfere with walking.
Fabric characteristics may be the limiting factor. A very fluid material can fold and swing dramatically, sometimes becoming caught around the legs. A more structured fabric may preserve its outline but hold additional width away from the body.
Neither behavior is inherently wrong. The choice depends on whether you prefer a flowing, changing silhouette or a more consistent, architectural one.
For a practical comparison, walk along a clear, safe stretch of floor while observing the trousers from the front and side. If useful, record a short video with the camera positioned far enough away to show the entire silhouette.
Look for three things: whether the waistband remains in position, whether the hem clears the floor, and whether the upper and lower garment volumes still appear intentionally related.
If the waistband shifts, address the garment’s fit or stability. If the hem drags, reassess the length. If the garments simply look less balanced in motion, test a visible waistline or different upper layer before altering the trousers.
Take one baseline full-length photo, make one reversible change, and compare the result after walking. Keep the adjustment that better supports your intended silhouette while preserving comfort and movement. The most useful proportion correction is one that works beyond the mirror.
Can I improve outfit proportions without buying new clothes?
Yes. Start with reversible adjustments such as tucking a shirt, opening a jacket, repositioning an existing belt, or changing how layers overlap. Compare the silhouette before and after each change. Buying another garment is unnecessary when the issue can be resolved by modifying how existing pieces are combined.
Do I need to measure my body to use the rule of thirds?
No. The rule of thirds is a visual styling convention rather than a standardized body-measurement system. Compare the visible sections of your outfit in a full-length photograph and experiment with the main dividing line. Approximate visual relationships matter more than achieving an exact mathematical ratio.
Why does an outfit look different in a photo than in a mirror?
Camera position, distance, lens perspective, pose, and lighting can change the apparent relationships between body and garment lengths. A close camera angled upward or downward can exaggerate particular regions. For more useful comparisons, use similar camera height, distance, posture, and framing in successive photographs.
Should the top and trousers always have contrasting volumes?
No. A fitted top with relaxed trousers is one option, but oversized-on-oversized outfits can also look intentional. With two voluminous garments, a visible waistband, controlled shoulder, coherent color palette, or open vertical layer can help establish structure. The goal is a readable relationship between shapes, not a compulsory fitted-versus-loose formula.
When is tailoring a better solution than another styling adjustment?
Consider tailoring when the desired improvement requires a permanent change in garment length or fit, such as shortening trousers that regularly drag. Persistent seam rotation or leg twisting deserves a construction assessment before alteration. A tailor can evaluate what is feasible for the garment’s pattern and fabric, but not every structural problem can be corrected through hemming.